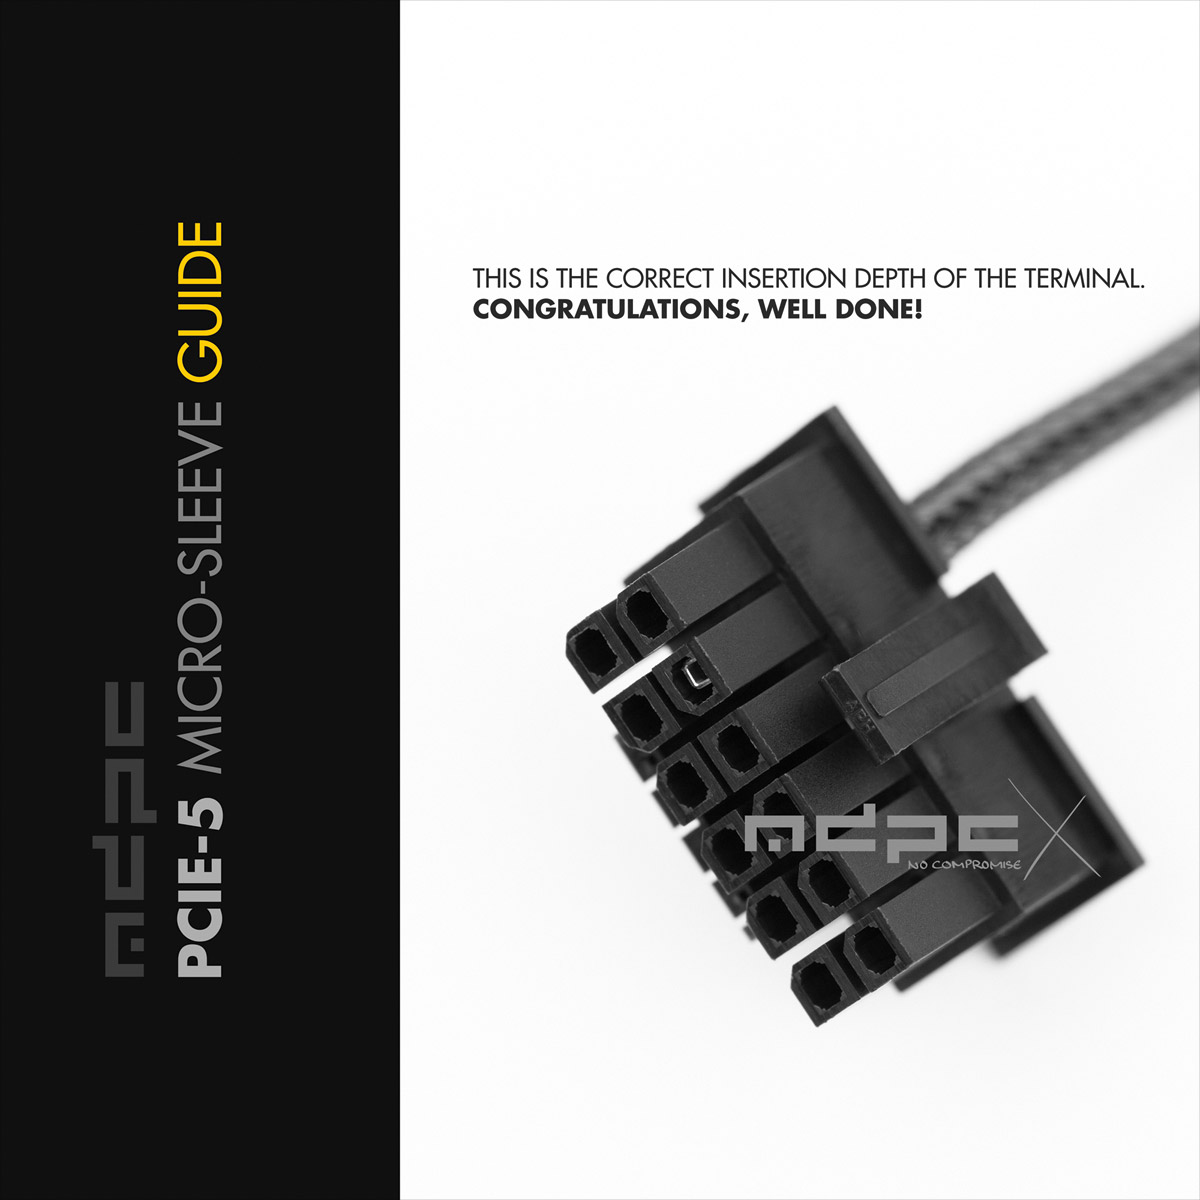
Position the heat-shrink as explained before. The sleeve will be melted underneath. The melt of the sleeve under the heat-shrink will end where the heat-shrink ends.Melt the sleeve: Carefully move the heat-shrink through the flame. Do not get too close to the unprotected sleeve. Twist the cable to apply heat evenly from all sides. You will see the melting process. Make pauses. During pauses, the heat-shrink will still transfer heat and further melt the sleeving. If the unprotected sleeve melts, try again. Practice and precision is everything. While the heat-shrink is hot, it’s very soft. While it’s soft, remove it quickly. Make sure to have a clean crimp terminal afterwards.If all previous steps were done correctly, the insertion into the connector will be very easy. The crimp terminal faces upwards, the retention hook of the connector faces upwards.If done correctly, no melt will be visible.This is the minimum correct insertion depth of the terminal inside the 12V-2×6 / 12VHPWR connector. You will feel when the crimp terminal is locked into the connector correctly. Test with low force if it’s locked. Don’t pull too extreme on the wires, because the fine structured 12V-2×6 / 12VHPWR connector and terminals are not really made to be handled as hard as we were used to in the PC industry with ATX standards. You can pull out the terminals from a 12V-2×6 / 12VHPWR connector without a pin-remover.Optional: If the wire does not go into the connector, you can insert it again into the second slot of the crimp tool and carefully „crimp“ it. Use the pre-open function of your tool if the force gets too high. This optional method is not needed if all steps were executed exactly as explained.